
Kitchen Cabinet
So, last Monday, I had two projects going, three if you count the one I was helping my friend with. Hers we finished on Monday. The mirror for the dresser was finished on Tuesday, and on Saturday I finished the final project. It was a cabinet for the kitchen.

The fridge that came with the house was an ancient tan thing that did not work well. I had originally planned to switch it for the brand new one that was up in the apartment, but I did not have a chance to do it before my tenant moved in. I hoped to replace it as soon as possible.

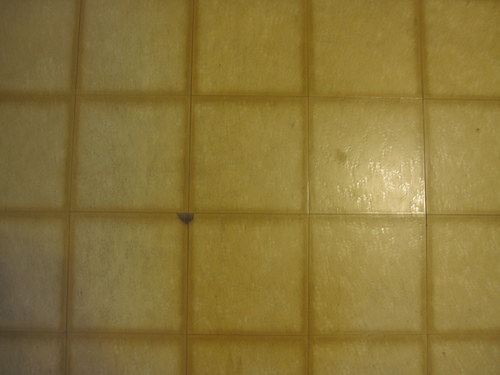
Combined with the hideous floor, the west wall of the kitchen looked really bad. I often hear people mention that certain floors do not show the dirt. Well, mine not only shows dirt, but manages to look dirty even when it is clean. The tile is probably original to the the house which was built in 1952. It is a crumbly laminate with holes and stains all over. My only hope is that we replace it soon. As I mentioned in my post on Friday, we already have the tile; we just have to put it on the floor.
Then, about a year and a half ago, my brother sold me an extra fridge that he had. It was a nice white one, but it had been in storage for over a year.I usually do not like to put a lot of pictures on the fridge, but there are a couple of black marks on this one, so I cover them up with pictures.

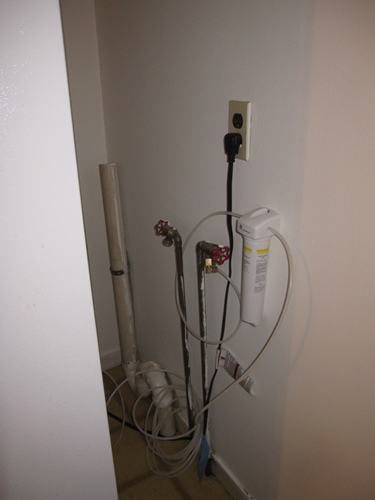
It worked well, but the water lines and filter had frozen and cracked, so it leaked water all over the place. It took Douglas several hours and many trips to Home Depot, but he finally got all of the pieces replaced. The original owner of the house had a clothes washer in the kitchen, so luckily all of the plumbing was there to hook up the water lines.
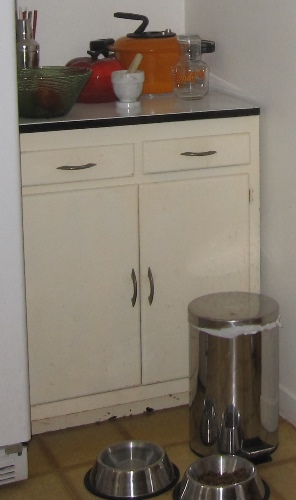
After I got the “new” refrigerator, the kitchen looked better, but there was still and empty space next to the fridge. I had a small garbage can there, but the floor was stained, and it really looked bad.

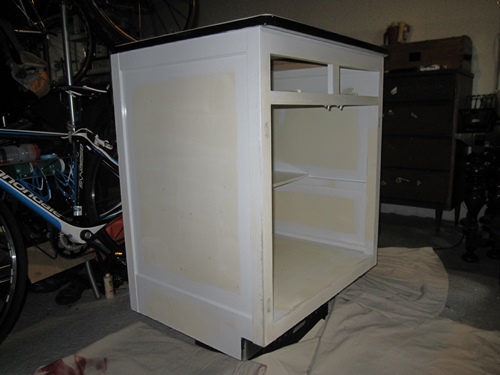
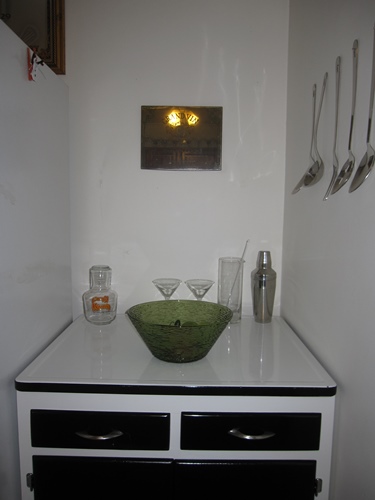
In March 2011, Douglas and I took a trip to South Carolina to visit his brother. On the way home, we stopped at a couple of antique stores. At one, I found this cabinet. It was wooden with a metal enameled covered top. I did not have the measurements for the space, but I hope that it would work because it was perfect. It was really dirty and the top appeared to be stained, but I was sure that I could fix it up. They were asking $55 for it, but I was able to talk them down to $40. When we got it home, it fit as though it had been built for the space. I was able to completely clean the top, and it made that wall look a lot better.
The mirror that is hanging over it, I bought at the same antique store for $5. It is an old wine advertisement that was most likely in a bar or liquor store.

It took me a while to get around to painting the piece, but last week I was finally ready. On Monday, I sanded and painted the doors and drawers.

I had some trouble with the spray paint. My first can ran out, and the second can did not have a wide spray, so the cabinets looked checkered. I had to use a roller brush and a can of paint to finish.
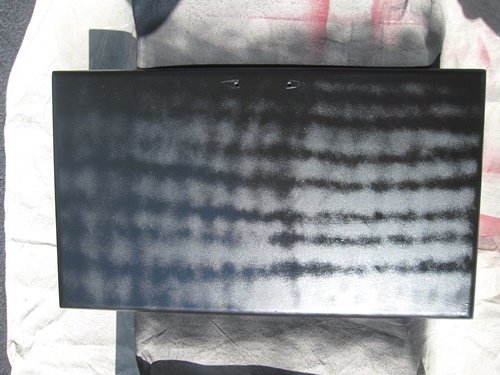
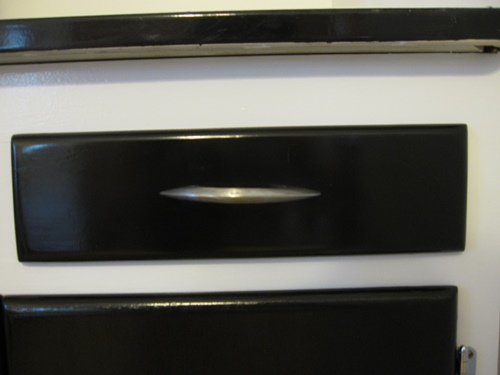
As you can see, I painted the drawers and doors black. I also painted the toe kick black.

I painted the rest of the cabinet white. On Wednesday, I sanded and then painted the trim around the piece.
On Thursday, I finished the painting.

On Friday, I cleaned the hardware. That was a task! The handles were pitted and rusty. I started cleaning them with WD-40.

Then, I switched to toothpaste. They looked a lot better, but still not perfect.
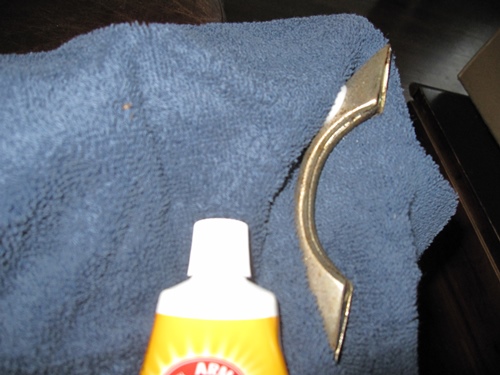
Finally, I sanded them with 440 grit sandpaper. This finally got them looking good.

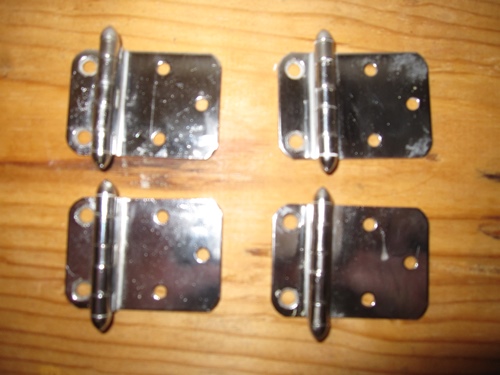
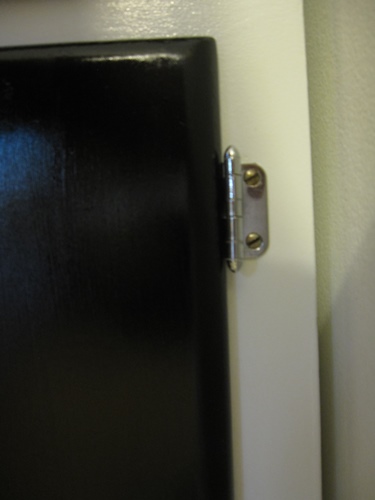
The hinges were a lot easier. They were painted with several layers of paint, but I have a good method for removing paint from hardware. I already used it to take the paint off of all the hinges in my house. I put them in a pot of simmering water with baking soda for about an hour. I also put the screws in, since they had been painted as well. If you do this, make sure to use a pot that you will never use for cooking. The residue from this process can be poisonous.

When I took them out, I rubbed the paint off and then polished them with WD-40. I could not believe how well they turned out. They looked brand new. Douglas was sure that they could not be original to the piece, but they had all the same layers of paint, so I am sure that they are old. They look beautiful. The pictures do not do them justice.
Here are the closeups of the handles and hinges on the piece.
On Saturday morning, before leaving for the race at 9:00 am, Douglas attached the hardware and mounted the doors for me.
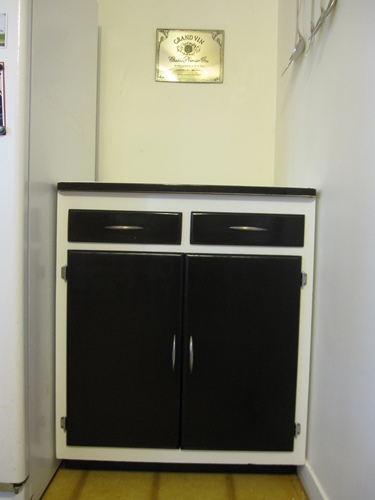
I added a few pieces to decorate, and this is the finished project and the first completed project in the kitchen.
I can’t wait until the rest of the kitchen is done!
Happy Homemaking!
I am a teacher, traveler, artist, writer, homemaker and a whole lot more. In January 2009, I bought the Cape of Dreams. It was the second house that I had ever owned, but it was the first that I bought by myself. I now live in the house with my husband Douglas, our dog Kahlua, and Crème de Menthe, the cat. Because, what life is complete without a little Kahlua and Cream? I love arts and crafts of all kinds, and I refinish furniture as well. We are slowly redoing our entire house. You can read about my projects on my blog www.CapeofDreams.com
Jess – you are just too clever.
Thank you Susan. I try!
Black and white, how divine. I never knew you could boil off paint from hardware with a little baking soda! Fortunately non of our hardware has paint but it did have years of grime and smoke residue which came off with a little bit of Windex and some manual labor.
I should have know you would like the color scheme. 😉 That was the best trick ever. Almost every piece of hardware in our house was painted when we moved in. Slowly but surely I have been boiling off all of the paint.