
Let There Be Light
I am not God, but I was able to add a lot of light to my house this week. I accomplished that by asking Douglas to hang three light fixtures. It was that simple.
The good part was that there were thunderstorms again yesterday. I say that is a good thing for me, but it is bad for him. It meant that his workout was limited to a three-mile run and I was able to use him for house projects. In case you are wondering why a three-mile run is considered a short workout, he is training for his seventh Ironman this July.

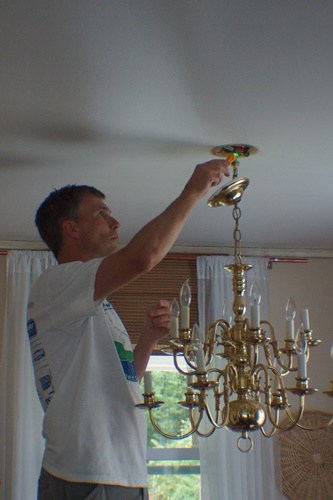
We started in the dining room. We had planned to take this light fixture out since we moved in. Douglas hated it, and I did not like it at first. I must admit that it has grown on me. I particularly like how shiny it is when the light bounces off of it. However, it really is too big for this room.

I also wanted to hang the light fixture that hung in my grandparent’s dining room when I was growing up. I asked for it when they were moving out, and they were happy to give it to me. It has been in storage for seven years now.
The reason that I did not hang it up sooner is that it was lost in storage at my mother’s house. We had all searched for it in vane since 2010 when I bought the Cape of Dreams, but it was not to be found. Then, this spring my mother stumbled across it in the attic, somewhere we had looked numerous times. I am just glad that it finally reappeared.

Light fixtures are fairly easy to change, so if you are looking for a quick update to a room this could be a good one. The only problem is that light fixtures can be expensive, so it is not always a cheap renovation. I was lucky to have been given this fixture for free.
The first thing you need to do is to turn the power off. Our fuse box is not labeled, so the method we use is not technical but is highly effective. We turn the light on, and then Douglas goes downstairs. He proceeds to turn off the switches one by one. When the light goes off, I yell, “OFF!” He comes upstairs. We take the additional step of using a Voltage Tester to test the wires for power.
This handy gadget is cheap and useful for not electrocuting yourself. No one wants to fry themselves while changing a light fixture… at least no one in this house.

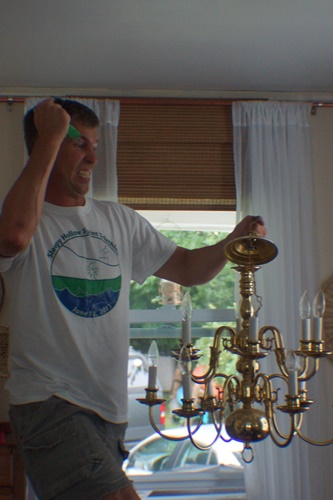
The next step is to take off the current fixture. It is a matter of untwisting some wires. They are often wrapped in electrical tape, so you will have to take that off first. There will also be a wire nuts that you will remove. After removing the tape and nuts, unwrap the wires, and unscrew the fixture.

The old brass chandelier is gone! Did I mention that Douglas really hated it?
There are no pictures of the installation of the new light because I was needed to hold it. I tried to get Crème to take a picture, but it turns out that she only wanted to be in the picture. Kahlua, as always, ran at the first sight of the camera.

Installation consists of more twisting of wires and some screwing. Just do all of the same steps you used to remove the old light fixture but in reverse. It could not be easier. Before you screw the cover plate on, we suggest that you turn the power back on to make sure that it works.
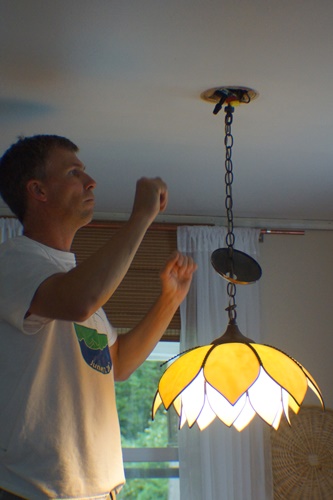
Behold the new flower in our dining room. I cannot stop looking at it. It is so much simpler than the fixture that was there before.The only thing that bothers me is now it is painfully obvious that the window is off centered. I am hoping that no one but myself will notice. I guess that I should not have mentioned that on the internet. Oops. If you come to my house, please do not notice that the window in the dining room is off centered. Thank you in advance.

We could have stopped there, but of course we did not. On to the living room, where we installed the matching fixture. This one should have been easier because it has a cord and plug and does not require connecting wires. Rather, it should not have required connecting wires but the bulb socket was loose and missing a screw. It had to be replaced. I did not take any pictures of that because it was boring. You simply need to loosen the screws holding the wires, take off the wires, place them on the new socket and tighten those screws.

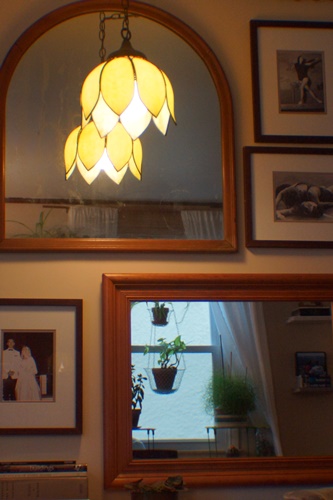
I chose to hang the lamp in the living room so that you could see both fixtures at the same time. I debated about hanging it over the table in the center of the circular couch, but I thought it would be better to hang it closer to the wall since Douglas hits his head on everything. I chose to put it in front of a mirror to create more light. We used a simple ceiling hook to hang the lamp. Since there was not a stud where we wanted the fixture, Douglas first put in a wall anchor. We put two little hooks in the crown molding to run the chain down the wall.
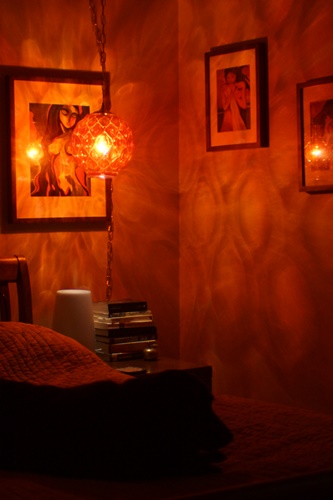
The third light was one that I purchased on eBay after Christmas. I thought that the red light would be romantic in the bedroom. It is most likely from the same era as the other two fixtures, and I think that it fits well in our house, which was built in 1952.

Now I cannot decide if it is too red-light district in here. I think I like it. We will see if we can get used to it. I know that I have to move that print, but I am too lazy right now.

Kahlua seems to like it. As soon as we turned it on, she wanted to be on the bed. She even allowed me to photograph her.
This also means that two more boxes from the disaster of a basement have been emptied. Yay! A lot more will be moving out this weekend if it stops raining long enough. The plan is to have a yard sale on Saturday and Sunday. If you are in Westchester, NY and would like to come by (buy) let me know and I will email you the address.
Happy Homemaking!
I am a teacher, traveler, artist, writer, homemaker and a whole lot more. In January 2009, I bought the Cape of Dreams. It was the second house that I had ever owned, but it was the first that I bought by myself. I now live in the house with my husband Douglas, our dog Kahlua, and Crème de Menthe, the cat. Because, what life is complete without a little Kahlua and Cream? I love arts and crafts of all kinds, and I refinish furniture as well. We are slowly redoing our entire house. You can read about my projects on my blog www.CapeofDreams.com
I’m going to start calling you a Homemaking Goddess! I love the light fixtures — beautiful choices!
Thanks Cindy! You should stop by our yard sale tomorrow or Sunday.
Just love all your new fixtures! So great to have something “old” that matches the decor of you house.
The best part is that it will really make my grandmother happy to see these fixtures in use again.
Thanks for visiting my site, I have another one, LOL. I also love blogging because i can see temperate plants from others’ posts. Regarding this post, there’s no man in the house and i have long wanted to change my light in a corner, but can’t seem to figure out about how yet! But i don’t like any red light even when sleeping.
You don’t need a man to change a light. Have a friend come help you because it’s easier when someone holds the light for you, but it’s not that hard. I have confidence in you! Since I did get married until my late thirties, I learned to do most everything myself.
I understand your feelings about the red light. I love red, and it is still a bit much for me. I will use it every once in a while for ambience I think. I have another light on my bedside for reading and every day use.
Ooh–these are cool–especially the golden flowers. Reminds me of my old hippie roots. Groovy, man!
🙂 I like the thought of them being hippie lights. My mom grew up with them and didn’t like them, but she came over tonight and said they felt like home to her. I guess she just needed some time to miss them!
Hi Jessica,
Thank you for visiting my Garden Tea party post at Victorian Wanna Be.
Your light fixtures are beautiful!
Gina
Thanks Gina! Your site inspired me to throw a tea party. So much fun and beautiful!
Those are such beautiful fixtures! I’m totally jealous!
Thanks Laurel! When I took them, everyone in my family thought that I was crazy. Now there are several that wish they had nabbed them!