
Weirdly Cool Kitty Lamp
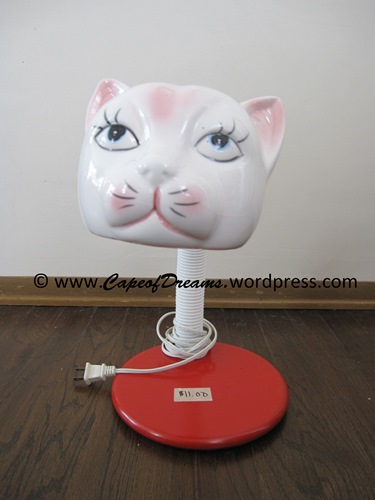
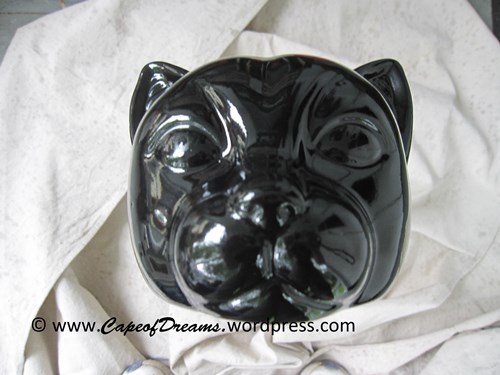
Early in the summer I was going to garage sales with my friend Krystal every weekend. We found a lot of “treasures” in our forays, especially Krystal who bought some great things for her one-year-old daughter. I found this lamp at an enormous church sale. As you can see from the tag in the picture, they were asking $11 for it. I think that Krystal was more than slightly mystified about why I wanted to buy it. I must admit that even I found it ugly in its original state, but I love cats and thought that I could make it look better.
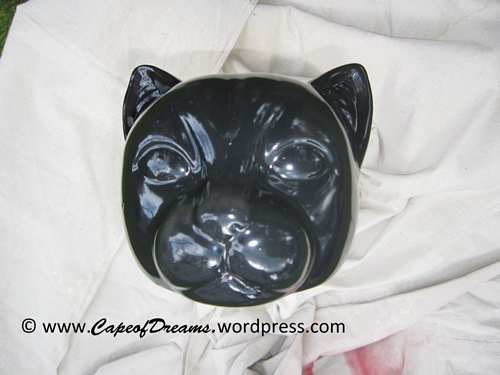
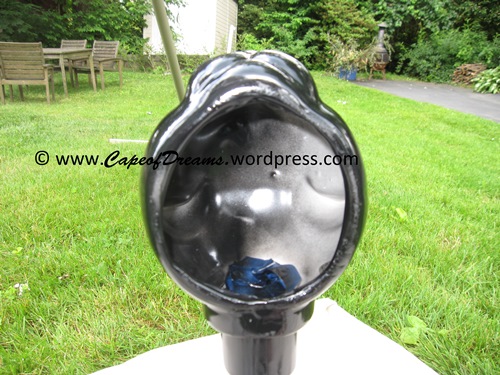
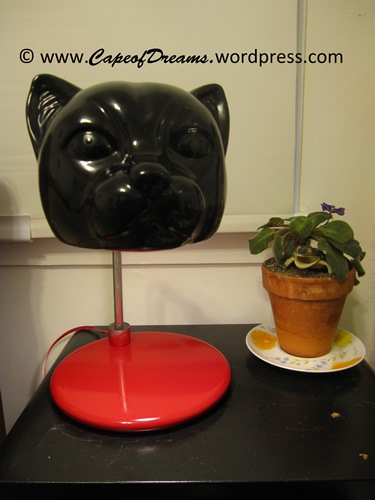
It really did not need much work. The most time consuming part was waiting for the paint to dry between coats, and it took three coats. At one point it started raining, and I had to move the project to the back porch. I used Krylon Fusion for Plastic spray paint, which states that you can use for plastic, metal, wood, wicker and more without sanding or priming. It dries to the touch in about fifteen minutes but you should not handle it until after an hour. Additional coats should be added before twenty four hours pass or after seven days. It also takes seven days until it is fully chip resistant, so make sure that you keep it somewhere safe for a week after painting. You should follow the instructions if you decide to spray paint and practice on something before you start your project. I chose to paint the head black because black cats have always been my favorites. I did not worry about painting the inside, but I knew that some paint would get in when I painted the bottom of the head, so I made sure to cover the light bulb socket.
First coat


Second coat

Third coat


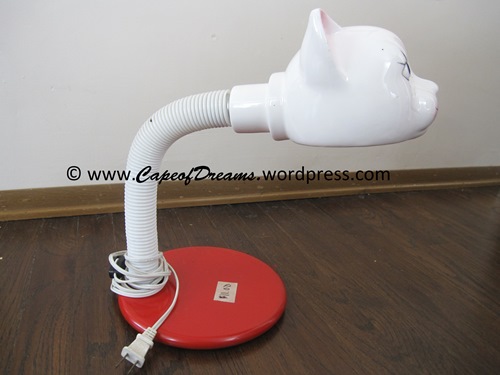
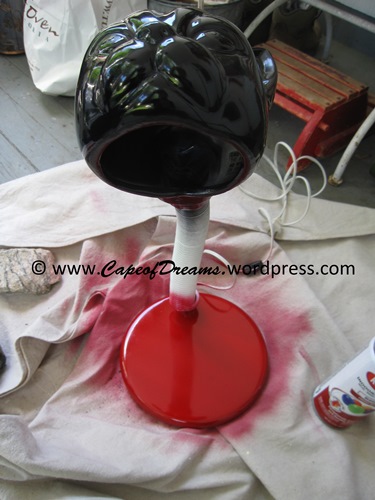
The base was already red and I have a great deal of red accents in my house, so I decided to keep it red and just gave it a couple of coats to cover some chips. After the paint was dry, I cut off the plastic sleeve around the neck. The metal looks better in my opinion.
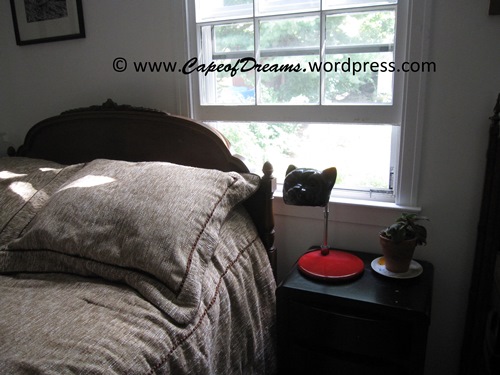
The lamp now sits on the guest room night stand. I read every night and hate when I go to somebody’s house and they do not have a lamp next to the guest bed. So, if you have a guest room, make sure that there is a lamp there for your guests! You can always buy an ugly one at a garage sale for cheap and fix it up. If you don’t have time for a project, buy something nice and relatively inexpensive at Target.
That is the entire project. It was done in a day. Douglas would like to drill holes in the eyes and put a red light bulb in it. I agree that it would look cool, but I am afraid that the ceramic would shatter when we tried to drill the holes. If anyone knows how it can be done without ruining the lamp, please, let me know. That would look great peering out of a window at Halloween.
I don’t know where you could find a lamp like this one, but here is another that I like a lot. (This is an affiliate link. You will not pay any more, but I could earn a small percentage if you purchase through this link.)
Happy Homemaking!
I am a teacher, traveler, artist, writer, homemaker and a whole lot more. In January 2009, I bought the Cape of Dreams. It was the second house that I had ever owned, but it was the first that I bought by myself. I now live in the house with my husband Douglas, our dog Kahlua, and Crème de Menthe, the cat. Because, what life is complete without a little Kahlua and Cream? I love arts and crafts of all kinds, and I refinish furniture as well. We are slowly redoing our entire house. You can read about my projects on my blog www.CapeofDreams.com
Leave a Reply